


Sulphate, Silicone & Paraben Free
Curly Girl Method Friendly
Suitable for ALL Curl Types
Salon Professional Haircare
Fast Delivery
Proudly South African
Vegan & Cruelty-Free
Sulphate, Silicone & Paraben Free
Curly Girl Method Friendly
Suitable for ALL Curl Types
Salon Professional Haircare
Fast Delivery
Proudly South African
Vegan & Cruelty-Free
Sulphate, Silicone & Paraben Free
Curly Girl Method Friendly
Suitable for ALL Curl Types
Salon Professional Haircare
Fast Delivery
Proudly South African
Vegan & Cruelty-Free
Sulphate, Silicone & Paraben Free
Curly Girl Method Friendly
Suitable for ALL Curl Types
Salon Professional Haircare
Fast Delivery
Proudly South African
Vegan & Cruelty-Free
PLEASE NOTE:
First time users of our products should follow the IntrinsiCurly Me "Clean Slate" Method before following the IntrinsiCurly Me "3 Step" Method to ensure they prepare their curls for the magic to happen.
Come Clean Gentle Cleanser
A sulphate-free, creamy cleanser designed as a lightweight alternative to heavy cowashes, perfect for wavy and fine hair.
It gently cleanses while locking in moisture, leaving your hair soft, frizz-free, and ready for styling.
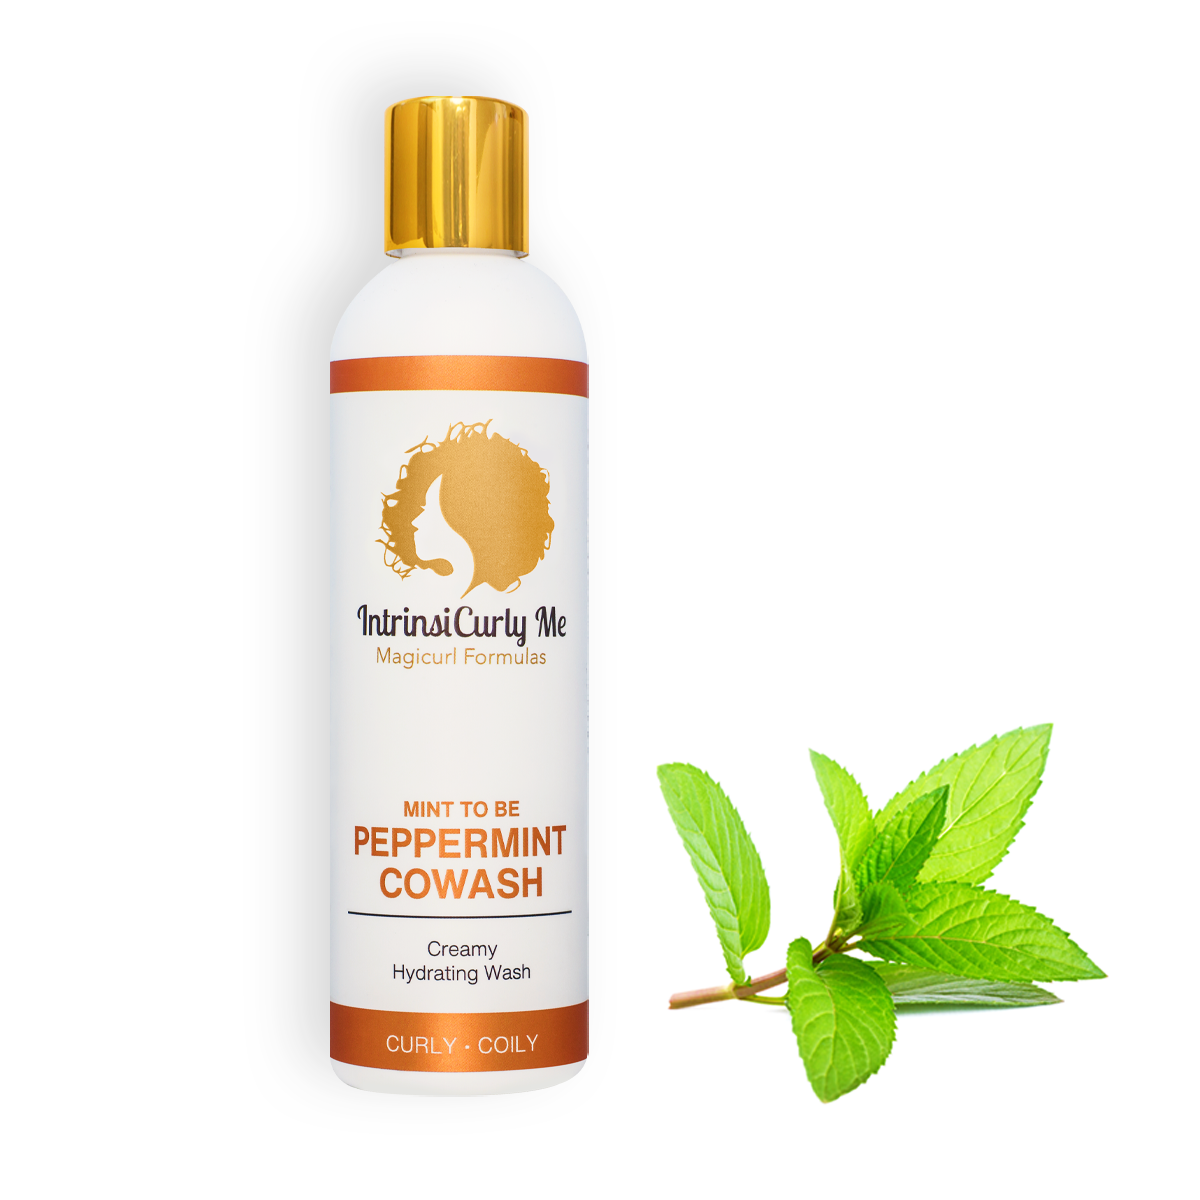
Mint To Be Peppermint Cowash
A sulphate-free conditioning wash that provides a mild cleanse. Excellently detangles while adding moisture and hydration.
It's perfect for regular use for dry, coarse, curly or coily hair.
Washing Instructions
⮕ CLICK HERE TO EXPAND INSTRUCTIONS
⮕ CLICK HERE TO EXPAND INSTRUCTIONS
1. Start by thoroughly wetting your hair, making sure that it is sopping wet.
2. Squeeze some Come Clean Gentle Cleanser (for fine, wavy Type 2 hair) or Mint To Be Peppermint Co-Wash (for curly Type 3 and coily/kinky Type 4 hair) into your
hands.
3. Apply the cleanser to your scalp and hair.
4. Massage your scalp thoroughly using your finger pads in circular motions.
5. Use a “milking” motion to move the product from roots to ends. If needed, add more water instead of more product and emulsify.
6. Continue milking the product through the hair. Keep the hair sopping wet at all times by adding water if it begins to dry out.
7. Make sure you’ve spread the cleanser evenly, all the way to your ends. It won’t foam and that’s completely normal, it is a non lathering product and is creamy by nature.
8. Wash for at least 2 to 3 minutes to remove all dirt, sweat, and buildup.
9. Rinse thoroughly with clean water.
10. Proceed immediately to conditioning using The One & Only Creamy Conditioner (for all curl types).
The One and Only Creamy Conditioner
A conditioner that delivers intense hydration and protein to strengthen, nourish, and soften curls of all types.
Whether used as a rinse-out, leave-in, or deep conditioning treatment, it adapts to your curls’ needs, leaving hair frizz-free and manageable.
Conditioning Instructions
⮕ CLICK HERE TO EXPAND INSTRUCTIONS
⮕ CLICK HERE TO EXPAND INSTRUCTIONS
1. Make sure your hair is still sopping wet before applying conditioner.
2. Start with a teaspoon of conditioner. If you're new to IntrinsiCurly Me, you may need more conditioner than usual at first, up to 2 teaspoons. Over time, as your hair becomes more hydrated, you’ll need less.
3. Apply The One & Only Creamy Conditioner to your scalp and hair.
4. Massage your scalp well with your fingertips.
5. Use the same “milking” motion from roots to ends. Add more water instead of more product to emulsify and distribute.
6. Begin finger detangling your hair, starting at the ends and working your way up. Add water as needed to help glide through knots.
7. Smooth the cuticle down until your hair feels slick, like seaweed. This is a key step to reducing frizz.
8. Time to 'squish to condish'. Gather sections of hair into your palms and squish upward to the root. You should hear a squishy, wet sound.
9. Trickle in a bit more water and squish again. There’s no such thing as too much squishing!
10. This whole process should take 1 to 5 minutes.
11. Rinse thoroughly, especially your scalp. If needed, you can re-apply a tiny amount of conditioner to your ends. For finer hair, we recommend rinsing out completely.
Crème De La Curl Creme
A curl styling crème that locks in moisture and curl retention, delivering touchably soft, shiny, and frizz-free curls with a flexible hold.
Perfect for wavy and curly hair, it keeps curls defined and smooth all day long without the crunch.
Coiling Me Softly Curl Custard
Softens, hydrates, and elongates coils while supporting healthy hair, keeping your fro hydrated and defined.
Pair with Hold Me Baby Curly Hair Gel for added hold and frizz control.
Hold Me Baby Curly Hair Gel
Unleash your curls' full potential with Hold Me Baby Curly Hair Gel – powered by flax seed and chia to lock in moisture, control frizz, and defy humidity.
Form a cast, then scrunch it out for soft, touchable curls that shine and hold their shape all day!
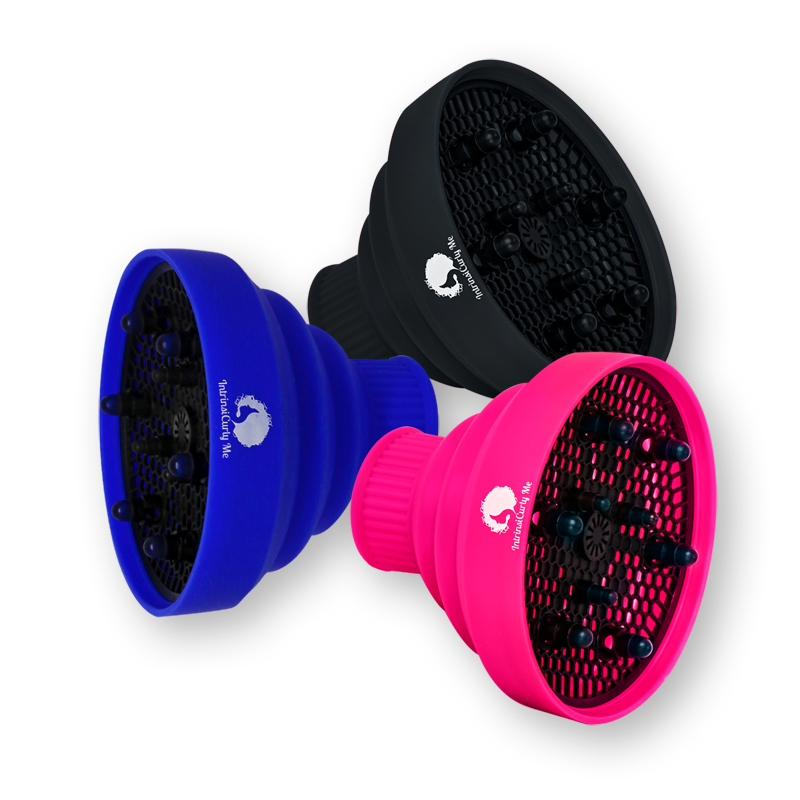
Universal Collapsible Silicone Diffuser
* Optional but recommended
Dry your curls faster, without the frizz. This travel-friendly, silicone diffuser enhances your natural curl pattern while minimising heat damage — and its flexible design fits most dryers or moulds to snugly accommodate a wide range of nozzles.
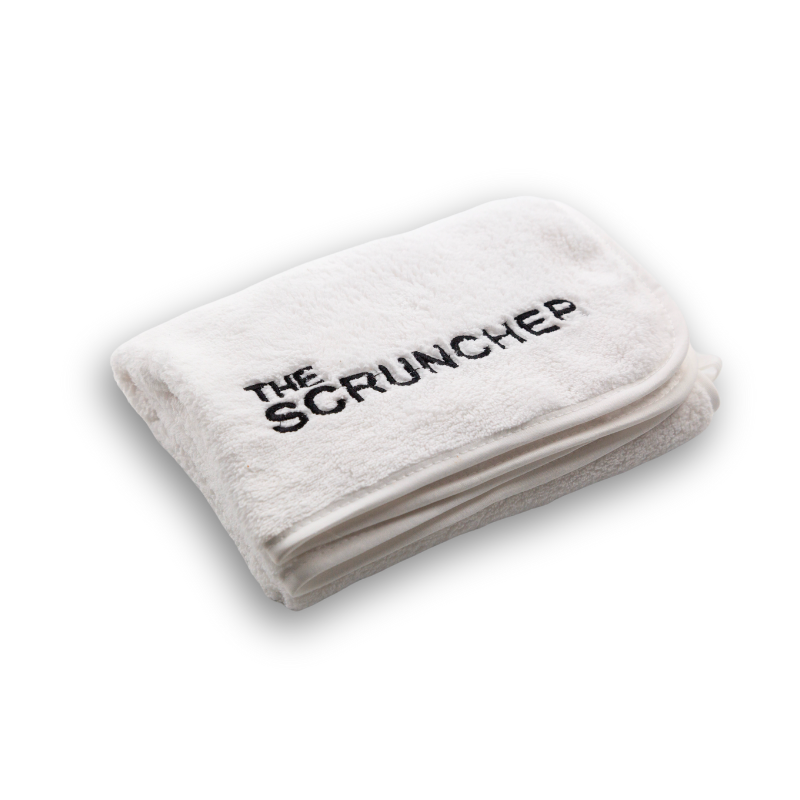
Scrunching Microfibre Towel
* Optional but recommended
An ultra-soft microfibre towel designed to gently absorb excess water without disturbing the curl clumps you’ve worked so hard to create. It speeds up drying time, reduces frizz, and supports beautifully defined curls with every scrunch.
Styling Instructions
⮕ CLICK HERE TO EXPAND INSTRUCTIONS
⮕ CLICK HERE TO EXPAND INSTRUCTIONS
1. Start with freshly cleansed, sopping wet hair.
2. Take a little bit of either the Crème De La Curl Crème (for wavy/curly Type 2–3 hair) or the Coiling Me Softly Curl Custard (for curly/coily Type 3–4 hair).
3. Emulsify the product between your hands until it turns white.
4. Apply to your hair while it’s still dripping wet. If you have wavy or curly hair, apply the product using the praying hands method. If you have coily or kinky hair, smooth it over your strands in sections.
5. Lightly scrunch to form curl clumps. If you see frizz, add more water instead of more product and squish again.
6. Now take 1-2 pumps of Hold Me Baby Curly Hair Gel (all curl types). You can add more if you have more hair or want a stronger cast.
7. Rub the gel between your palms and apply using the same method as your styling product. Use praying hands for wavies and curlies, smoothing for coilies.
8. Scrunch gently from ends to roots to set the curl clumps.
9. Use your Scrunching Microfibre Towel to gently squish out excess moisture. Place the towel over your hand and softly squeeze sections of hair to remove water without disrupting clumps. Hair should now feel damp, not dripping.
Alternatively, you can use the Curl Hugger instead of the towel. To do this, gently insert your curls into the Curl Hugger, secure it at the back using the built-in button loop, and press upward with your hands to gently absorb excess water. This method is perfect if you prefer a hands-free option that still helps preserve curl clumps and minimise frizz.
10. Do not touch your hair while it dries, as this causes frizz and disturbs the curl pattern.
11. Dry by either air drying or diffusing using your Universal Collapsible Silicone Diffuser on low to medium heat and airflow.
12. Once your hair is 100% dry, gently scrunch out the gel cast to reveal soft, bouncy, shiny curls. For more volume, flip your head and shake out the roots only.
Congratulations!
You’ve completed the IntrinsiCurly Me 3-Step Method — your go-to regular wash day routine. If you need a clean slate or refresh, try our Clean Slate Method.